Fluffy Gluten Free Hot Dog Buns
Make soft, fluffy, and sturdy gluten free hot dog buns at home! This easy recipe yields healthy hot dog buns that won't crumble or fall apart.

- 1Introduction: Why Finding Good Gluten Free Hot Dog Buns is Hard
- 2Why You’ll Love These Healthy Hot Dog Buns
- 3Ingredients Overview: The Science Behind Hot Dog Gluten Free Baking
- 4Essential Equipment You’ll Need
- 5Step-by-Step Instructions to Make Gluten Free Hotdog Buns
- 6Pro Tips & Tricks for Flawless Results
Ingredients
Dry Ingredients
- 2 cups gluten-free 1-to-1 baking flour (with xanthan gum)
- 2 tablespoons psyllium husk powder
- 2 teaspoons active dry yeast
- 1 tablespoon sugar or honey
- 1 teaspoon salt
Wet Ingredients
- 1 1/4 cups warm water
- 1 tablespoon apple cider vinegar
- 2 large eggs (or flax eggs for vegan hot dog buns)
- 2 tablespoons melted butter or olive oil
Instructions
Instructions
Whisk together warm water, yeast, and sweetener in a small bowl and let bloom for 5 minutes.
Instructions
In a stand mixer, combine the gluten-free flour, psyllium husk powder, and salt.
Instructions
Add the yeast mixture, apple cider vinegar, eggs, and melted butter to the dry ingredients.
Instructions
Beat on medium-high speed for 4-5 minutes until a smooth, sticky dough forms.
Instructions
Divide dough into 6 equal portions. Shape into logs with wet hands and place in a greased hot dog bun pan.
Instructions
Let rise in a warm, draft-free place for 45-60 minutes until doubled in size.
Instructions
Bake at 375°F (190°C) for 18-22 minutes until golden brown.
Instructions
Cool completely on a wire rack before slicing and serving.
Equipment You'll Need
Here's what I use to make this recipe perfectly every time:
- Digital kitchen scale — for exact metric dry measurements → Buy Now
- Stand mixer — Essential for beating the wet and dry components together. → Buy Now
- Baking pan — Keeps the shaped dough from spreading too flat in the heat. → Buy Now
- Parchment paper — Prevents delicate bottoms from tearing when removed. → Buy Now
Recipe FAQs
Can I make these gluten free hot dog buns without psyllium husk?
Why did my hot dog gluten free buns collapse in the center?
Can I shape these without a special hot dog bun pan?
Are these healthy hot dog buns allergy-friendly?
How do I prevent gluten free hot dog buns from crumbling when sliced?
Can I freeze the dough before baking?
Fluffy Gluten Free Hot Dog Buns
Make soft, fluffy, and sturdy gluten free hot dog buns at home! This easy recipe yields healthy hot dog buns that won't crumble or fall apart.
Prep Time
25 min
Cook Time
20 min
Total Time
45 min
Dry Ingredients
- 2 cups gluten-free 1-to-1 baking flour (with xanthan gum)
- 2 tablespoons psyllium husk powder
- 2 teaspoons active dry yeast
- 1 tablespoon sugar or honey
- 1 teaspoon salt
Wet Ingredients
- 1 1/4 cups warm water
- 1 tablespoon apple cider vinegar
- 2 large eggs (or flax eggs for vegan hot dog buns)
- 2 tablespoons melted butter or olive oil
Introduction: Why Finding Good Gluten Free Hot Dog Buns is Hard
Summer grilling season always brings back fond memories of backyard cookouts with family. Yet, if you live a wheat-free lifestyle, finding decent store-bought gluten free hot dog buns feels like an impossible mission. Most commercial options taste like cardboard and crumble into dust the second they meet a juicy sausage.
Here’s the thing about those disappointing grocery store packages. They rely on cheap starches that leave you with a dry, dense crumb that falls apart entirely. You deserve better than watching your favorite grilled meal dissolve into a messy tragedy on your plate.
Building on this frustration, I spent months testing flour ratios in my kitchen to solve this exact problem. What I discovered is that a specific blend of psyllium husk and warm water creates the ultimate fluffy texture. You will finally get soft, pillowy gluten free hot dog buns that actually bend without breaking.
Let us dive right into the simple steps required for your best summer barbecue yet.
Why You’ll Love These Healthy Hot Dog Buns
In my kitchen, summer cookouts always meant settling for crumbly bread until I developed this method. Building on this, you get an incredibly soft and fluffy texture that rivals traditional wheat bread. Gluten free hot dog buns usually fall apart, but these hold their shape proudly.
You will notice several distinct advantages every time you bake a batch:
- Sturdy structure that holds heavy toppings like chili and cheese without falling apart.
- Easily adaptable to become completely vegan hot dog buns with simple pantry swaps.
- Freezer-friendly nature makes weekend prep an absolute breeze.
- Simple to whip up for spontaneous backyard cookouts.
Trust me on this one, nobody at your table will ever guess these are allergy-friendly. Hot dog gluten free options in stores cost a fortune for cardboard-like results. Instead, you get bakery-quality results right in your own oven.
Ingredients Overview: The Science Behind Hot Dog Gluten Free Baking
When I first started experimenting with baking gluten free hot dog buns in my home kitchen, I quickly realized that traditional wheat-free bread making is part chemistry experiment and part culinary art. Without the natural elasticity of gluten to trap expanding air bubbles during the rise, we have to completely rebuild structural integrity from scratch. After countless batches that crumbled apart the moment they touched a grilled sausage, I finally cracked the code to achieving that soft, pillowy texture we all crave for summer cookouts.
Let’s break down the exact pantry staples that make this magic happen:
- Gluten-free 1-to-1 baking flour blend (containing xanthan gum): This serves as your foundational base, but make sure your store-bought blend includes xanthan gum, as this binder is non-negotiable for trapping moisture and holding the crumb together.
- Psyllium husk powder: Consider this your ultimate secret weapon. Unlike basic starches, pure psyllium husk adds incredible elasticity and mimics the chewy mouthfeel of traditional bakery bread.
- Active dry yeast: Essential for providing the organic rise that keeps your handheld rolls from turning into dense hockey pucks.
- Warm water and apple cider vinegar: This dynamic duo works in tandem to wake up the dormant yeast while the acid slightly tenderizes the heavier starches.
- Eggs or flax eggs: These provide critical structural binding and protein richness so your buns hold their oblong shape beautifully on the baking sheet without flattening out.
Here is the thing about formulating dough for homemade gluten free bread: you cannot simply swap pantry ingredients around without carefully adjusting your liquid ratios. What I discovered through trial and error is that psyllium husk absorbs a massive amount of hydration compared to standard wheat flour. If you skimp on the liquids, your batch will turn into a dry, crumbly disaster. Conversely, getting the liquid temperature right is equally vital for yeast activation. You must keep your water strictly between 105°F and 110°F to feed the yeast comfortably without shocking or killing the living organisms. If your tap water runs too hot, your dough will simply refuse to rise, leaving you with flat, sad rolls.
Never skip the apple cider vinegar, either. While its sour scent might make you hesitant, the acid reacts gently with the baking components to lighten what would otherwise be a heavy crumb structure. Skipping it is a common beginner mistake that results in a flat flavor profile and a dense, gummy texture.
Once your dough has been gently kneaded and shaped into uniform oblong logs, transfer them carefully to a parchment-lined baking sheet and let them proof in a warm, draft-free spot until they are puffy and light. Preheat your oven to a robust 375°F (190°C). Bake the buns for roughly 18 to 22 minutes, or until the tops are golden brown and sound hollow when gently tapped on the bottom.
Crucially, do not rush the cooling process! Let your freshly baked rolls rest on a wire rack for at least 30 minutes before attempting to slice them. Cutting into piping hot gluten-free bread releases trapped steam prematurely, causing the interior to gummy up. Once completely cooled, use a serrated bread knife to slice them just ¾ of the way through so your favorite grilled sausages and heavy condiments stay securely nested inside. To store leftovers, keep them in an airtight container at room temperature for up to two days, or slice them beforehand and freeze them for up to a month, quickly reheating them in a toaster oven whenever a backyard craving strikes.
Essential Equipment You’ll Need
Getting your kitchen ready before you mix any dough changes everything. Here’s the thing about baking without wheat flour. You need specific gear to capture the right structure.
- Stand mixer fitted with a paddle attachment for smooth mixing
- Digital kitchen scale for exact metric dry measurements
- Hot dog bun pan or standard heavy-duty baking sheet
- Unbleached parchment paper for non-stick baking results
- Soft pastry brush for applying an even egg wash
What I discovered is that hand mixing just will not cut it for this specific batter. The paddle attachment beats air into the heavy starches effectively.
- Stand mixer: Essential for beating the wet and dry components together.
- Baking pan: Keeps the shaped dough from spreading too flat in the heat.
- Parchment paper: Prevents delicate bottoms from tearing when removed.
Trust me on this one and pull your tools out now. In practice, having your workspace organized stops the sticky dough from getting out of hand. You will notice that a scale beats measuring cups every single time for dry goods. That golden brown crust depends heavily on your pastry brush work right before baking.
Step-by-Step Instructions to Make Gluten Free Hotdog Buns
-
Let’s kick things off by waking up the yeast. In a large mixing bowl, combine your warm water—aiming for that sweet spot between 105°F and 110°F—with a touch of honey or sugar. Sprinkle your active dry yeast right over the surface, give it a gentle stir, and let it sit undisturbed for about 5 to 10 minutes. You are looking for a nice, frothy layer to form, which tells you the yeast is alive, happy, and ready to work its magic.
-
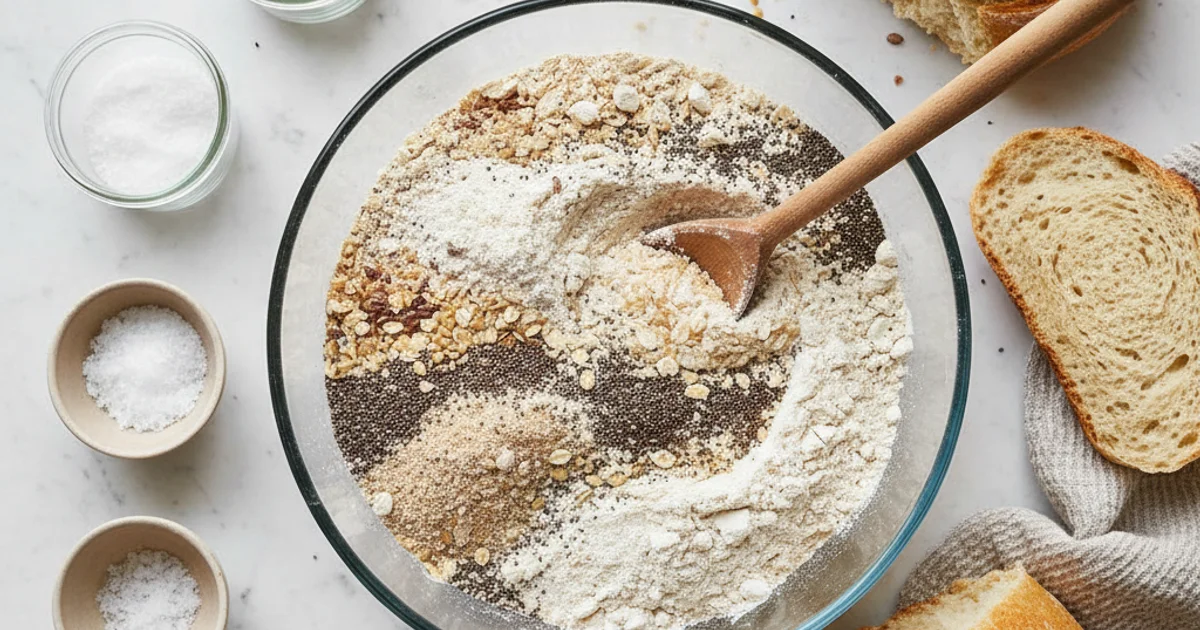
While the yeast is doing its thing, grab a separate mixing bowl to whisk together your dry ingredients. Combine your favorite gluten-free all-purpose flour blend with psyllium husk powder, baking powder, and a pinch of salt. Take a few extra seconds here to whisk really well; distributing that psyllium husk evenly is the secret handshake of gluten-free baking, as it creates the elasticity and structure we desperately need.
-
Pour your activated yeast mixture, along with a couple of room-temperature eggs, a splash of apple cider vinegar, and melted butter or neutral oil, straight into the bowl of dry ingredients. Using a stand mixer fitted with the paddle attachment—or a sturdy spatula and some arm muscle—beat everything on medium-high for 2 to 3 minutes. You’ll notice a cohesive, smooth, yet characteristically sticky dough starts to form.
-
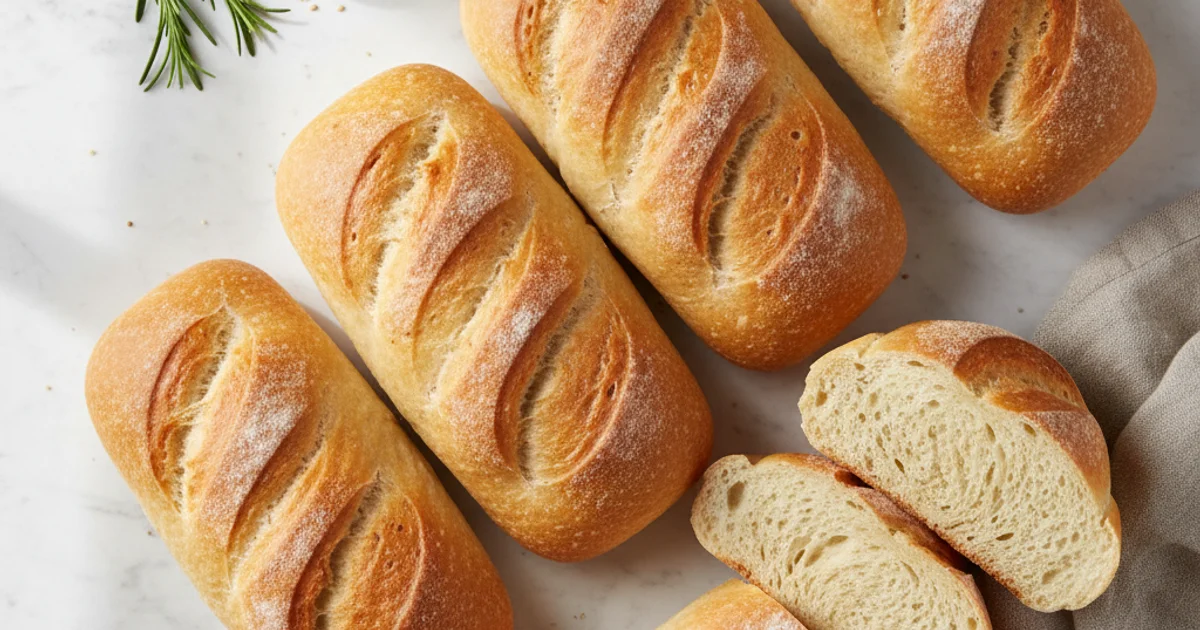
Because this dough loves to cling to fingers, wet your hands slightly with water before handling. Divide the dough into equal portions and gently roll each piece into a log that matches the length of your baking pan. Nestle each shaped log directly into a greased specialty bun mold, smoothing the tops down ever so gently so they bake up looking uniform and inviting.
-
Drape a damp towel or a sheet of lightly oiled plastic wrap loosely over the pan. Move your setup to a cozy, draft-free corner of the kitchen and let the dough rise until the logs look visibly puffy, light, and doubled in volume—usually about 45 to 60 minutes depending on your kitchen’s ambient temperature.
-
While the shaped dough is finishing up its second rise, go ahead and preheat your oven to 375°F (190°C). Ensuring the oven is fully heated before the pan goes in is crucial for getting a proper oven spring in gluten-free breads.
-
Once the oven is ready and the buns are puffy, remove the covering and bake them on the center rack for 18 to 22 minutes. You are looking for them to turn a rich, golden-brown color on top and sound slightly hollow when gently tapped.
-
Resist the urge to slice into them right away! Transfer the hot pan to a wire cooling rack and let the baked goods rest in the pan for about 10 minutes before turning them out to cool completely. Slicing too early can leave you with a gummy texture. Once completely cooled, use a serrated bread knife to slice them open, load them up with your favorite summer cookout fixings, and enjoy. If you happen to have leftovers, store them in an airtight container at room temperature for a couple of days, or freeze them for your next backyard barbecue.
Pro Tips & Tricks for Flawless Results
Weigh your ingredients by grams rather than cups for precise hydration, as gluten-free flours pack down heavily in measuring cups.
For more details on flour density and weights, check out this guide on measuring flour accurately.
Keep your hands slightly damp or oiled when shaping the sticky dough to prevent it from clinging to your fingers.
Do not skip the psyllium husk in this recipe, because it acts as the primary binder to replace the missing gluten network.
Allow the baked vegan hot dog buns to cool completely before slicing so the interior crumb can fully set and firm up.
- Use whole husk psyllium powder rather than psyllium capsules for the best structural integrity in the dough.
- Check the internal temperature with a digital thermometer to ensure the center hits 205°F before pulling them from the oven.
- Steam the oven during the first five minutes of baking by tossing a few ice cubes onto a preheated baking sheet below.
A common mistake is rushing the rise time in a cold kitchen, which leads to dense, heavy bread.
Instead, find a warm, draft-free spot like your oven with the light turned on to encourage a healthy rise.
Following these exact parameters ensures your healthy hot dog buns turn out remarkably soft and flexible every single time.
Enjoyed this recipe? Share it with a friend or save it to your board for later. Leave a comment below — I love hearing how it turned out!
You May Also Enjoy
You Might Also Love These 🍽️
Recipes picked just for you based on what you’re cooking